This is a step by step guide on how to add support for Perforce Helix Core (former Perforce) version control system and enable team collaboration directly in WireframeSketcher. This is done by installing the P4Eclipse official Perforce Eclipse plug-in.
Installing
Follow these steps to install the Perforce plugin:
1. Download the update site archive for P4Eclipse plugin (prefer the more recent version of Eclipse) from:
https://www.perforce.com/plugins-integrations/eclipse-plugin
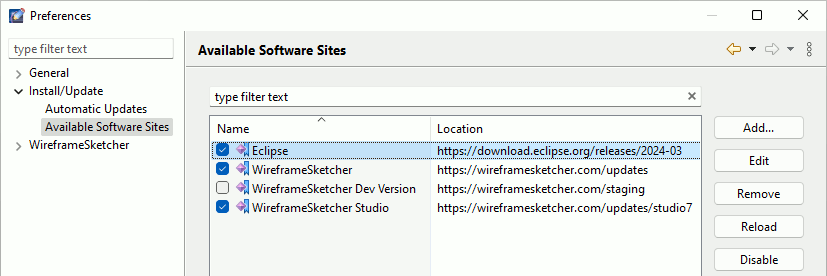
2. Enable Eclipse update site in WireframeSketcher’s preferences under Window > Preferences > Install/Update > Available Software Sites:

Make sure that the Eclipse entry is checked.
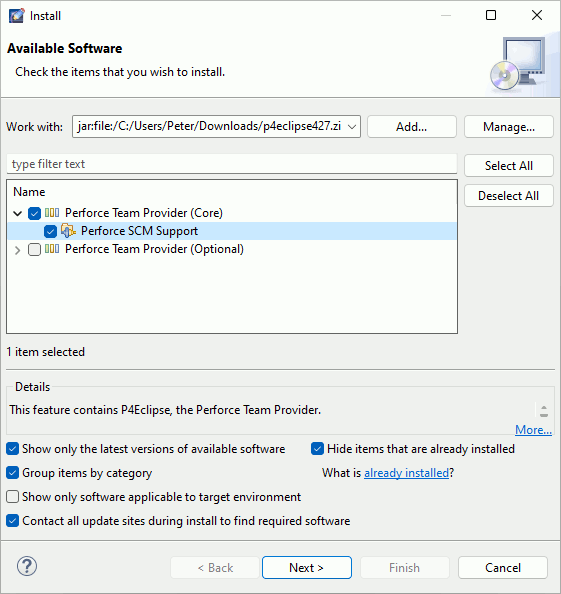
3. Open Help > Install New Software… wizard, then click Add… button and then Archive… button and choose the downloaded update site archive file.
4. Check the Perforce SCM Support entry in the list

5. Make sure the option that says Contact all update sites during install to find required software is checked and click Next
6. Go through the installation steps and choose to restart at the end
To learn how to use the P4Eclipse plugin follow the P4Eclipse Help.
Note that to connect to a Perforce server you’ll need to switch to Perforce perspective first using Window > Open Perspective > Other… > Perforce. To switch back to Wireframing perspective use Window > Open Perspective > Other… > Wireframing.
Uninstalling
To uninstall the Perforce plugin select Help > About WireframeSketcher > Installation Details then choose Perforce SCM Support and click Uninstall… and then Finish.